Creative Wall Ideas
 Looking for an easy and cost effective way to jazz up a wall or create a central focal point in a room?
A 3D wall panel can be the way to achieve this!
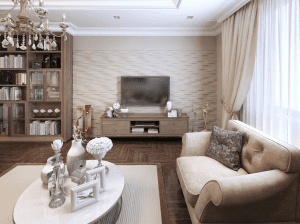
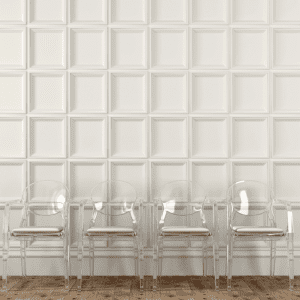
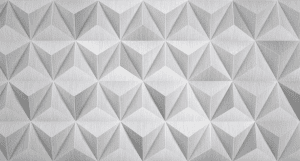
3D wall panels can instantly transform a plain interior wall to a dramatic feature from which other elements from the room can easily flow.
No need to invest in other artwork and expensive furniture when sculpted wall panels are the stand-out piece. Popular for both residential and commercial buildings it is the perfect option to breath some life into either space.
With so many design combinations to choose, from different finishes, textures, patterns and colours you can easily pick your own unique wall décor that suits you and your space.
3D wall paneling can also be designed into furniture such as bar and reception desks fronts, bed heads, small cabinets and entertainment units.
Australian made 3D wall panels are the unique style you’ve been looking for and very easy for DIY installation. The board can be adhered to the wall/surface directly out of the box! Note: they can only to be installed on flat surfaces.
3D wall panel installation process
1st Step: Installation
The key to a successful is installation is a thought out and well planed layout. You have to make the decision whether the 3D board will be wall to wall, floating design or a design that has a border etc.
Best way to determine a layout is to sketch it out and first and see what suits in your space.
2nd Step: Adhering to Wall
The 3D board has to be glued straight onto the wall using a heavy-duty wallpaper glue i.e latex or tile paste.
In addition to spreading the glue evenly on the wall I suggest coating the back of the board as well before you apply to the wall. Use a damp cloth to wipe away any excess adhesive.
3rd Step: Placing 3D board on Wall
Check the boards are level and straight by marking lines of the position using a ruler on the wall.
On wall-wall installation it works best if you work across the wall from corner to corner starting at the top. Remember it is very important to make sure all edges are properly bonded to the wall during installation.
To create a even and professional result it is essential you place all boards at an even distance from one another.
4th Step: Primer Coat
To seal the 3D board it is essential to apply a prime coat. Make sure the board is fully dried first.
5th Step: Finishing Touches
If your design layout is tiled your job is done! If you want the boards to have a more seamless finish you can fill in the gaps using plaster or putty filler before you put the primer coat.
6th Step: Add some Paint
 If you followed the steps correctly you will now have a 3D wall panel installed and ready to be painted.
The wall panel can be brushed or sprayed but if you want a more even finish I suggest spray.
From elegant and luxurious to modern and funky you’re guaranteed to add that “wow factor” into any space.
3D wall panels can instantly transform an area whether it be just a decorative wall panel to an entire wall.
Call Inspired Spaces today to see what you can do with your space.


Great Idea for 3D Wall Panelling, such a brilliant tip for me.
thanks for this beautiful article.
Do you do Hampton style wall panelling. If yes, looking for a quote for my hallway, TV Room and dining area.
Hi Victoria
We only specify finishes such as this for our builder/carpenter. We do not supply however.